Small Things, Big Place: Six Micro-Exercises to Suggest Scale and Depth in Outdoor Photos
Question
How can small, everyday foreground details turn a flat outdoor picture into an image that feels spatial, anchored, and recognizably of a place? These studio-notes are six short experiments that build the practical skill of using scale cues and foreground elements to suggest depth and context in outdoor photos.
Process
Each experiment takes 10–20 minutes and can be done during a single walk around a park, garden, street, or backyard. Work in order: each exercise adds one consideration to the last. Use any camera or phone. Carry a pocket notebook or use the notes app to jot a single line after each run: what changed in the picture?
Experiment 1 — Notice the Small Things
Objective: Train your eye to spot potential foreground objects.
- Stand in one place for five minutes and look at ground level: pebbles, leaf edges, a fence post, a puddle rim.
- Without taking photos, point at three elements that could sit in the foreground of a photo and mentally pair each with a background subject (tree, bench, distant figure).
- Note which combinations felt natural and why—size, texture, contrast, or line.
Experiment 2 — One Object, Two Distances
Objective: See how distance affects scale and depth.
- Choose one small object (a twig, rock, or broken petal). Make two frames: one with the object very close to the lens, one with the object a bit further away.
- Keep the background subject constant. Compare how much of the scene the foreground occupies and how it changes the perceived distance to the background.
- Note which distance felt most natural for suggesting scale and why.
Experiment 3 — Low Angle, High Impact
Objective: Learn how angle changes relationships between foreground and background.
- Bring the camera low—at knee or ground level—and place a small object near the lens. Take three frames while changing the camera angle slightly (tilt up, straight, tilt down).
- Watch how the background compresses or expands and whether the small object reads as tiny or dominant.
- Write one line about which angle best communicated “place” rather than just “object.”
Experiment 4 — Focus and Blur as Signposts
Objective: Use selective focus to balance attention between foreground and place.
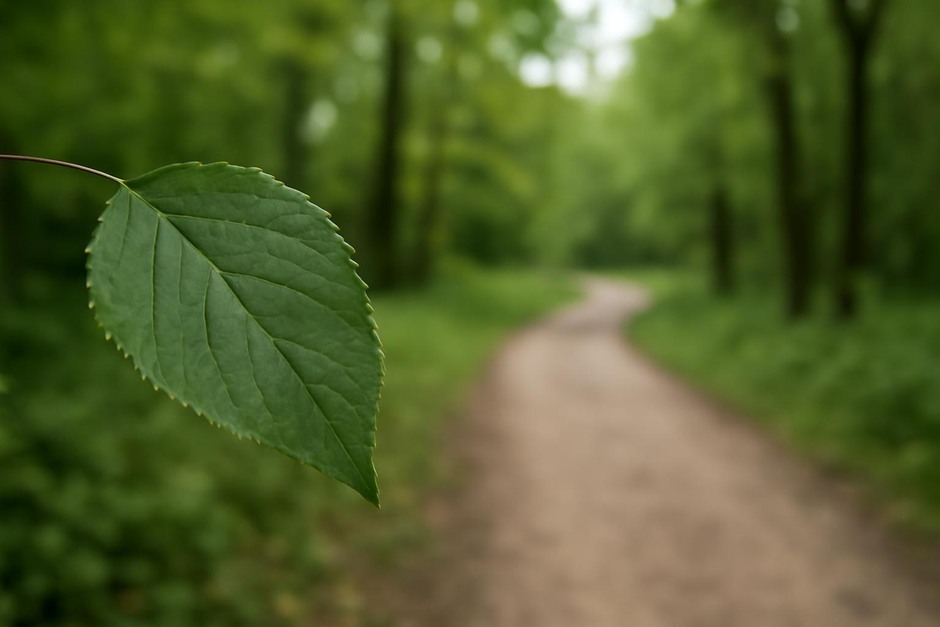
- Take three photos of the same composition: foreground sharp/background blurred, both sharp, foreground blurred/background sharp.
- Compare how attention shifts and which version suggests the space around the subject most convincingly.
- Decide when you want the viewer to read the foreground as a hint (soft) versus a strong presence (sharp).
Experiment 5 — Contrast and Texture Cues
Objective: Use tonal and textural contrast to help the eye read scale.
- Find a textured foreground object (moss, gravel, rusty metal) and place it in frame with a smoother, distant background (water, sky, lawn).
- Shoot with exposure that preserves texture detail in the foreground. Then underexpose slightly to see how loss of texture flattens perceived depth.
- Note how texture and contrast contribute to the sense of proximity.
Experiment 6 — Sequence: Tell a Tiny Place Story
Objective: Combine the previous steps into a short visual sequence.
- Create a three-image sequence from a single spot: (1) close foreground detail, (2) mid-distance that includes the foreground and background, (3) wider view that frames the whole place.
- Think of the sequence as a mini-essay: hint, context, reveal. Check whether the foreground element provides continuity and a stronger sense of place.
- Write a quick note: which single foreground object worked best across all three frames and why.
Review
After the six experiments, compare your notes and images. You should notice two practical habits emerging: first, you’ll start seeing tiny objects as composition partners rather than distractions; second, you’ll be more deliberate about distance, angle, and focus to control how the viewer perceives depth.
Next steps: repeat the set in a different season or time of day, or try it in an urban setting where manmade scale cues—curbs, gutters, handrails—play the role of natural foregrounds. The exercises are small by design: they are micro-practices you can fold into short walks and slow afternoons, each run sharpening the skill of suggesting a larger place through small things.
Studio note: keep one image from each run as a reference in a simple folder labeled “foreground tests.” Over months, that folder becomes a personal atlas of how you render depth and place.